Showing posts with label leaked. Show all posts

How to Update Galaxy S4 I9505 with Leaked Android 4.3 Jelly Bean Firmware

Monday, August 19, 2013

Are You Looking For How to Update Galaxy S4 I9505 with Leaked Android 4.3 Jelly Bean Firmware
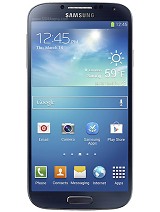

Owners of Samsung Galaxy S4 with model number GT-I9505 can now try out the features and capabilities of Android 4.3 Jelly Bean. SamMobile has reportedly managed to port the leaked Android 4.3 from Galaxy S4 Google Play Edition (GT-I9505G) to the Snapdragon variant of Samsung Galaxy S4.

System details
PDA: I9505GUEUBMFP
CSC: I9505GXARBMFP
Version: Android 4.3
Built date: Jun 26, 2013

Samsung Galaxy S4 I9505 users can now install the leaked Android 4.3 Jelly Bean on their devices by following the tutorial below.

Pre-requisites
1. Install USB Driver for Samsung Galaxy S4 I9505 on the computer.
2. Enable USB Debugging Mode on the phone by navigating to Settings >> Developer Options.
3. Make a backup of all your important data before following the guide.
4. The Galaxy S4 I9505 should be factory unlocked and not locked to any particular carrier.
5. Ensure the battery of the phone is charged more than 80 per cent.
6. Root Galaxy S4 I9505
7. Install Custom Recovery (CWM or TWRP).
8. The leaked Android 4.3 Jelly Bean firmware is compatible only with Samsung Galaxy S4 I9505. Applying this to any incorrect variant might brick the device. Verify the model number of the Galaxy S4 I9505 by navigating to Settings >> About Phone.

File Required
Leaked Android 4.3 Jelly Bean Firmware (Choose either one)
- Android-4.3-I9505GUEUBMFP-Odexed-I9505.zip
MD5: 363ED9CC32A841A512E72372A19C7D05
- Android-4.3-I9505GUEUBMFP-Deodexed-I9505.zip
MD5: 74D241B64266220161018EB98A19F279

Steps to Update Galaxy S4 I9505 with Leaked Android 4.3 Jelly Bean Firmware
Step 1: Connect the Galaxy S4 I9505 to the computer using USB cable.
Step 2: Copy the Leaked Android 4.3 Jelly Bean Firmware file to internal SD card of your phone.
Step 3: Once the file transfer process is completed, switch off the phone and disconnect it from computer.
Step 4: Boot the device into CWM Recovery by pressing and holding Volume Up, Home, and Power buttons together until the device turns on.
Step 5 (optional): In CWM Recovery mode, create a Nandroid backup of your currently installed ROM by navigating to Backup and Restore >> Backup. Once backup process is completed, return to main recovery menu.
Step 6: Perform a Wipe data/Factory Reset (Necessary due to new Android version).
Step 7: Select install zip from sdcard and then choose zip from sdcard. Now, navigate to the Leaked Android 4.3 Jelly Bean Firmware file that you copied earlier and confirm the installation.
Step 8: Once installation process is completed, return to main recovery menu and select Reboot System Now.

Samsung Galaxy S4 I9505 should be now running on the leaked Android 4.3 Jelly Bean firmware. Head over to Settings >> About Phone to verify the software version running on the device.

Source: SamMobile

Thanks for Read How to Update Galaxy S4 I9505 with Leaked Android 4.3 Jelly Bean Firmware Article

How to Update Galaxy S3 I9300 with Leaked Android 4.2.2 Jelly Bean Official Test Firmware

Friday, August 9, 2013

Are You Looking For How to Update Galaxy S3 I9300 with Leaked Android 4.2.2 Jelly Bean Official Test Firmware


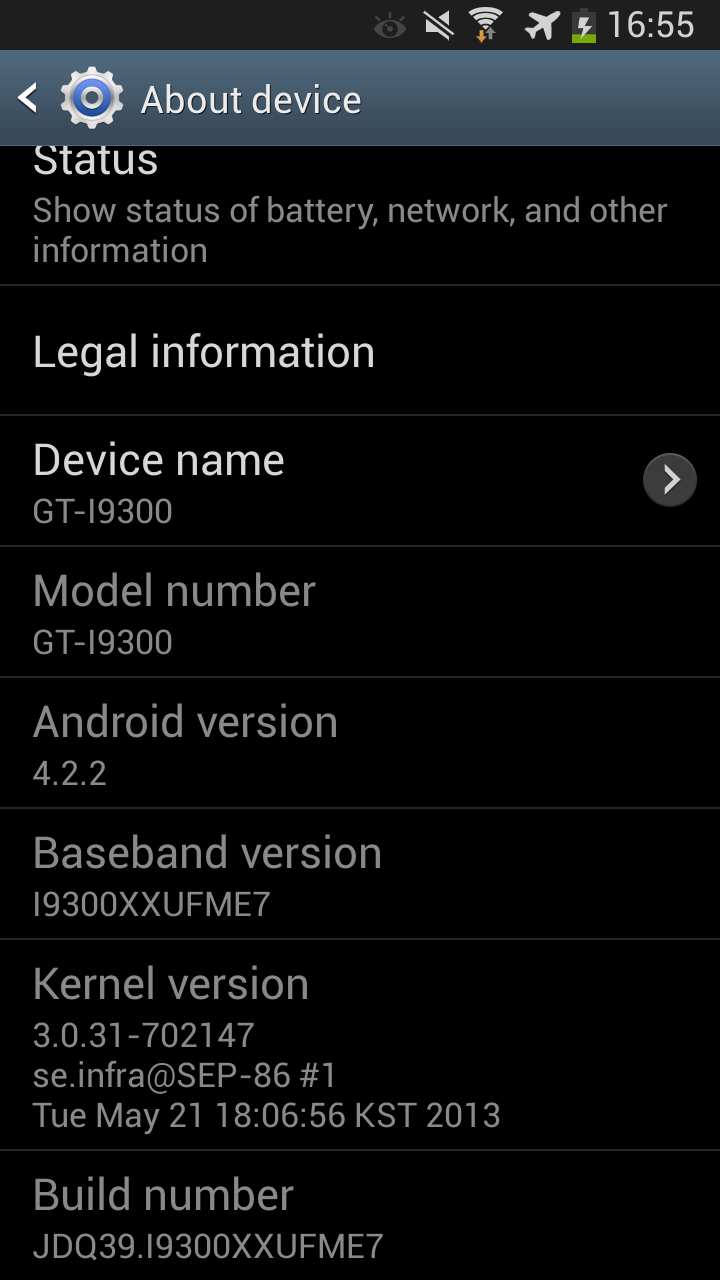
Android 4.2.2 Jelly Bean test firmware with build number I9300XXUFME7 has been leaked for the international version of Samsung Galaxy S3 bearing model number GT-I9300.

Firmware details
PDA: I9300XXUFME7
CSC: I9300OXAFME7
MODEM: I9300XXUFME7
Version: Android 4.2.2
Built date: May 21, 2013

Features included:
- Android 4.2.2 – Build ID: JDQ39
- New S4 Lockscreen: Multiple Widgets, two Unlock effects (Ripple and Light), improved ripple effect than Android 4.1.2, ability to change clock size and set a personal message
- New Screen modes (From S4): Adapt Display and Professional Photo
- Daydream
- Driving mode
- Actionable notifications
- New Additions in Notification Center
- Completely revamped Settings UI (Tabbed interface – Exactly like the S4)
- Addition of Voice controls (Let's you control various parts of the phone using voice commands – Galaxy S4 feature)
- Gallery modes have white background (When changing gallery modes to 3D the background changes to white)
- Full screen Samsung apps
- New S-Voice (From S4)
- New smart switch widget

Samsung Galaxy S3 I9300 users can now update their devices with the leaked version of Android 4.2.2 Jelly Bean firmware by following the tutorial below.

Pre-requisites
1. Install USB Driver for Samsung Galaxy S3 on the computer.
2. Enable USB Debugging Mode on the phone by navigating to Settings >> Developer Options.
3. Make a backup of all your important data before following the guide.
4. The Galaxy S3 should be factory unlocked and not locked to any particular carrier.
5. Ensure the battery of the phone is charged more than 80 per cent.
6. The Android 4.2.2 Jelly Bean firmware is compatible only with Samsung Galaxy S3 I9300. Applying this to any incorrect variant might brick the device. Verify the model number of the Galaxy S3 by navigating to Settings >> About Phone.

File Required
1. Android 4.2.2 Jelly Bean Firmware for Samsung Galaxy S3 I9300
2. Odin 3.07

Steps to Update Galaxy S3 I9300 with Android 4.2.2 Jelly Bean Firmware
Step 1: Extract Firmware zip file that you downloaded already from above link using winrar/7zip/winzip or any other extracting tool.
Step 2: Extract Odin zip file and you will get Odin3 v3.07.exe along with few other files.
Step 3: Power off your phone. Wait 5-6 seconds for vibration to confirm complete switch off.
Step 4: Boot the device into Download Mode by pressing and holding Volume Down + Home buttons together and then press the Power button until the device turns on. Now press the Volume Up button to enter Download Mode.
Step 5: Run Odin on the computer as an Administrator.
Step 6: Connect the Galaxy S3 to the computer using USB cable while it is in the Download Mode. Wait until Odin detects the device. When the device is connected successfully, the ID: COM box will turn blue with the COM port number. Additionally, the successful connected will be indicated by a message saying Added.
Step 7: Choose the following files in Odin from extracted I9300XXUFME7 firmware folder by using respective checkboxes:
  • Select the PDA checkbox, and choose the file named .tar or .md5.
  • Click the Phone checkbox, and choose the file with 'modem' in its name (ignore if there is no such file)
  • Click the CSC checkbox, and select the file with 'csc' in its name (ignore if such file is missing)
  • Choose the PIT checkbox, and choose the .pit file. Use only the file obtained during extracting in step 1 above, otherwise ignore it.
Step 8: In Odin, enable Auto Reboot and F. Reset Time checkboxes. Also, ensure the Re-Partition checkbox is chosen only if a .pit file was chosen in the previous step.
Step 9: Verify everything suggested in Step 7 and Step 8 is done correctly. Then hit the START button to begin the installation process.
Step 10: Once the installation process is completed, your phone will restart and soon you will see a PASS message with green background in the left-most box at the very top of the Odin. You can now unplug the USB cable to disconnect your device from computer.

Samsung Galaxy S3 I9300 should be now updated with leaked version of Android 4.2.2 Jelly Bean firmware. Head over to Settings >> About Phone to verify the software version running on the device.

Android 4.2.2 XXUFME7 Jelly Bean

Note: If Galaxy S3 I9300 stuck at booting animation after Step 10 then go to recovery mode (press and hold the Volume Up, Home and Power buttons together) and perform Wipe data/Factory Reset and Wipe Cache Partition task before selecting reboot system now function. In recovery mode use Volume keys to navigate between options and Power key to select the option. Please note, performing wiping task will erase your device internal memory data and not external SD card data.

Source: SamMobile

Thanks for Read How to Update Galaxy S3 I9300 with Leaked Android 4.2.2 Jelly Bean Official Test Firmware Article

How to Update Galaxy Grand Duos I9082 with Leaked Android 4.2.2 Jelly Bean Official Test Firmware

Thursday, August 8, 2013

Are You Looking For How to Update Galaxy Grand Duos I9082 with Leaked Android 4.2.2 Jelly Bean Official Test Firmware


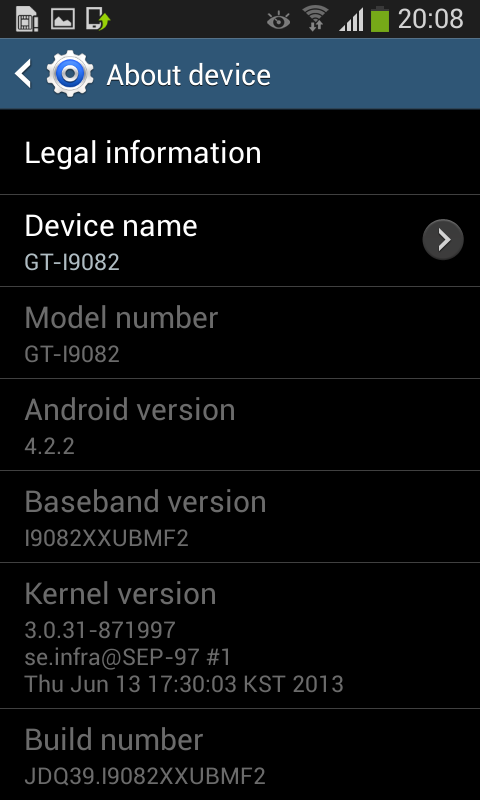
An official test firmware based on Android 4.2.2 Jelly Bean has leaked for Samsung Galaxy Grand Duos with model number GT-I9082.

Firmware details
PDA: I9082XXUBMF2
CSC: I9082OXABMF2
MODEM: I9082XXUBMF2
Version: Android 4.2.2
Built date: Jun 13, 2013

According to SamMobile, the leaked Android 4.2.2 update is expected to bring a host of new features such as transparent notification bar, Smart Stay, Light effect by unlocking, Page Buddy and Day dream.

Samsung Galaxy Grand Duos I9082 users can now update their devices with the leaked version of Android 4.2.2 Jelly Bean firmware by following the tutorial below.

Pre-requisites
1. Install USB Driver for Samsung Galaxy Grand Duos on the computer.
2. Enable USB Debugging Mode on the phone by navigating to Settings >> Developer Options.
3. Make a backup of all your important data before following the guide.
4. The Galaxy Grand Duos should be factory unlocked and not locked to any particular carrier.
5. Ensure the battery of the phone is charged more than 80 per cent.
6. The Android 4.2.2 Jelly Bean firmware is compatible only with Samsung Galaxy Grand Duos I9082. Applying this to any incorrect variant might brick the device. Verify the model number of the Galaxy Grand Duos by navigating to Settings >> About Phone.

File Required
1. Android 4.2.2 Jelly Bean Firmware for Samsung Galaxy Grand Duos I9082
2. Odin 3.07

Steps to Update Galaxy Grand Duos I9082 with Android 4.2.2 Jelly Bean Firmware
Step 1: Extract Firmware rar file that you downloaded already from above link using winrar/7zip/winzip or any other extracting tool.
Step 2: Extract Odin zip file and you will get Odin3 v3.07.exe along with few other files.
Step 3: Power off your phone. Wait 5-6 seconds for vibration to confirm complete switch off.
Step 4: Boot the device into Download Mode by pressing and holding Volume Down + Home buttons together and then press the Power button until the device turns on. Now press the Volume Up button to enter Download Mode.
Step 5: Run Odin on the computer as an Administrator.
Step 6: Connect the Galaxy Grand Duos to the computer using USB cable while it is in the Download Mode. Wait until Odin detects the device. When the device is connected successfully, the ID: COM box will turn yellow with the COM port number. Additionally, the successful connected will be indicated by a message saying Added.
Step 7: Choose the following files in Odin from extracted I9082XXUBMF2 firmware folder by using respective checkboxes:
  • Click the PDA checkbox, and choose CODE_I9082XXUBMF2_871997_REV05_user_mid_noship.tar.md5.
  • Click the Phone checkbox, and choose MODEM_I9082XXUBMF2_REV05.tar.md5.
  • Click the CSC checkbox, and choose CSC_OXA_I9082OXABMF2_871997_REV05_user_mid_noship.tar.md5.
  • Click the PIT checkbox, and choose baffin.pit.
Step 8: In Odin, enable Auto Reboot and F. Reset Time checkboxes. Also, ensure the Re-Partition option is not selected.
Step 9: Verify everything suggested in Step 7 and Step 8 is done correctly. Then hit the START button to begin the installation process.
Step 10: Once the installation process is completed, your phone will restart and soon you will see a PASS message with green background in the left-most box at the very top of the Odin. You can now unplug the USB cable to disconnect your device from computer.

Samsung Galaxy Grand Duos I9082 should be now updated with the leaked version of Android 4.2.2 Jelly Bean firmware. Head over to Settings >> About Phone to verify the software version running on the device.

Android 4.2.2 XXUBMF2 Jelly Bean

Note: If Galaxy Grand Duos I9082 stuck at booting animation after Step 10 then go to recovery mode (press and hold the Volume Up, Home and Power buttons together) and perform Wipe data/Factory Reset and Wipe Cache Partition task before selecting reboot system now function. In recovery mode use Volume keys to navigate between options and Power key to select the option. Please note, performing wiping task will erase your device internal memory data and not external SD card data.

Source: SamMobile

Thanks for Read How to Update Galaxy Grand Duos I9082 with Leaked Android 4.2.2 Jelly Bean Official Test Firmware Article

How to Update Galaxy Note 8.0 (Wi-Fi) N5110 with Leaked Android 4.2.2 Jelly Bean Official Firmware

Sunday, August 4, 2013

Are You Looking For How to Update Galaxy Note 8.0 (Wi-Fi) N5110 with Leaked Android 4.2.2 Jelly Bean Official Firmware


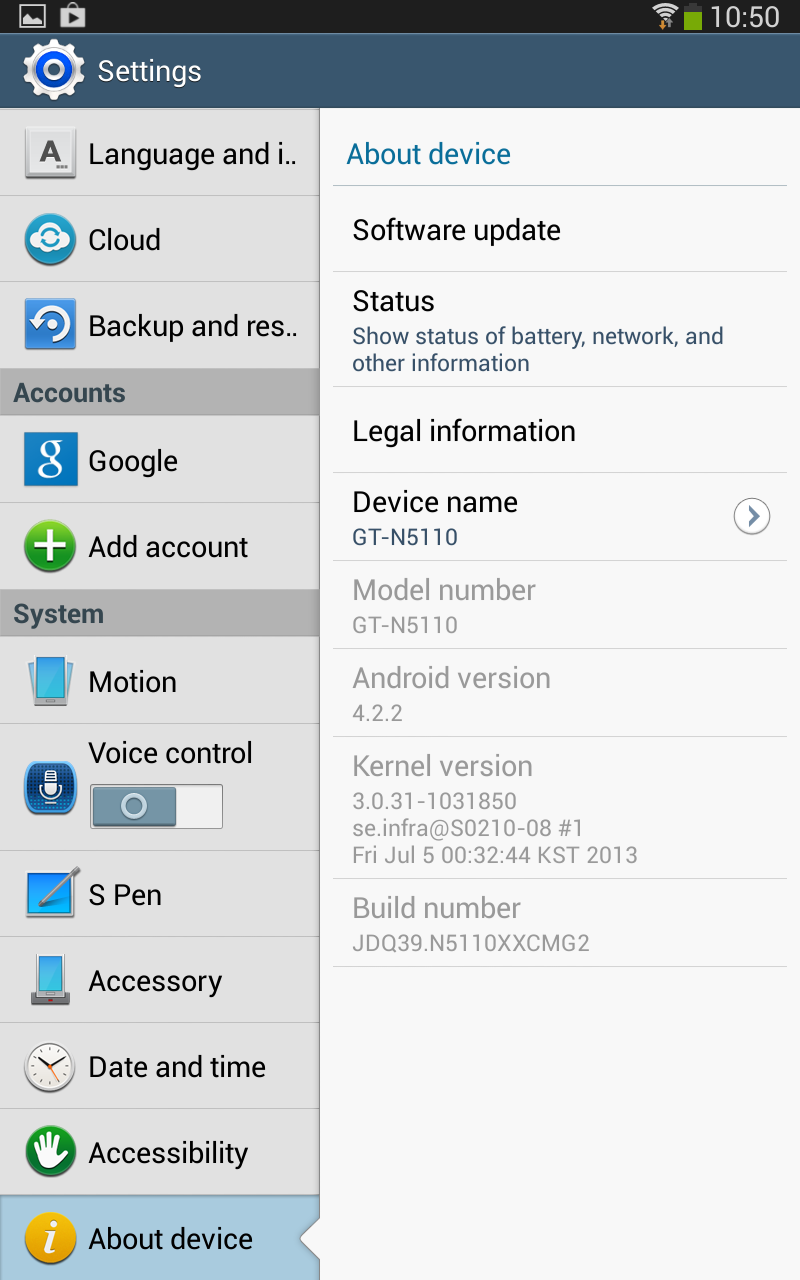
Official firmware based on Android 4.2.2 Jelly Bean has been leaked for the Wi-Fi variant of Samsung Galaxy Note 8.0 bearing model number GT-N5110.

Firmware details
PDA: N5110XXCMG2
CSC: N5110OXACMG2
Version: Android 4.2.2
Built date: Jul 5, 2013

Samsung Galaxy Note 8.0 (Wi-Fi) N5110 users can now update their devices with leaked Android 4.2.2 Jelly Bean firmware by following the tutorial below.

Pre-requisites
1. Install USB Driver for Samsung Galaxy Note 8.0 on the computer.
2. Enable USB Debugging Mode on the phone by navigating to Settings >> Developer Options.
3. Make a backup of all your important data before following the guide.
4. The Galaxy Note 8.0 should be factory unlocked and not locked to any particular carrier.
5. Ensure the battery of the phone is charged more than 80 per cent.
6. The Android 4.2.2 Jelly Bean firmware is compatible only with Samsung Galaxy Note 8.0 (Wi-Fi) N5110. Applying this to any incorrect variant might brick the device. Verify the model number of the Galaxy Note 8.0 by navigating to Settings >> About Phone.

File Required
1. Android 4.2.2 Jelly Bean Firmware for Samsung Galaxy Note 8.0 (Wi-Fi) N5110
2. Odin 3.07

Steps to Update Galaxy Note 8.0 (Wi-Fi) N5110 with Android 4.2.2 Jelly Bean Firmware
Step 1: Extract Firmware rar file that you downloaded already from above link using winrar/7zip/winzip or any other extracting tool.
Step 2: Extract Odin zip file and you will get Odin3 v3.07.exe along with few other files.
Step 3: Power off your phone. Wait 5-6 seconds for vibration to confirm complete switch off.
Step 4: Boot the device into Download Mode by pressing and holding Volume Down + Home buttons together and then press the Power button until the device turns on. Now press the Volume Up button to enter Download Mode.
Step 5: Run Odin on the computer as an Administrator.
Step 6: Connect the Galaxy Grand Duos to the computer using USB cable while it is in the Download Mode. Wait until Odin detects the device. When the device is connected successfully, the ID: COM box will turn blue with the COM port number. Additionally, the successful connected will be indicated by a message saying Added.
Step 7: Choose the following files in Odin from extracted N5110XXCMG2 firmware folder by using respective checkboxes:
  • Click the PDA checkbox, and choose CODE_N5110XXCMG2_1031850_REV01_user_low_ship.tar.
  • Click the CSC checkbox, and choose CSC_OXA_N5110OXACMG2_1031850_REV01_user_mid_noship.tar.
  • Click the PIT checkbox, and choose kona_wifi.pit.
Step 8: In Odin, enable Auto Reboot and F. Reset Time checkboxes. Also, ensure the Re-Partition checkbox is chosen.
Step 9: Verify everything suggested in Step 7 and Step 8 is done correctly. Then hit the START button to begin the installation process.
Step 10: Once the installation process is completed, your phone will restart and soon you will see a PASS message with green background in the left-most box at the very top of the Odin. You can now unplug the USB cable to disconnect your device from computer.

Samsung Galaxy Note 8.0 (Wi-Fi) N5110 should be now updated with official Android 4.2.2 Jelly Bean firmware. Head over to Settings >> About Phone to verify the software version running on the device.

Android 4.2.2 XXCMG2 Jelly Bean

Note: If Galaxy Note 8.0 (Wi-Fi) N5110 stuck at booting animation after Step 10 then go to recovery mode (press and hold the Volume Up, Home and Power buttons together) and perform Wipe data/Factory Reset and Wipe Cache Partition task before selecting reboot system now function. In recovery mode use Volume keys to navigate between options and Power key to select the option. Please note, performing wiping task will erase your device internal memory data and not external SD card data.

Source: SamMobile

Thanks for Read How to Update Galaxy Note 8.0 (Wi-Fi) N5110 with Leaked Android 4.2.2 Jelly Bean Official Firmware Article


Root Your Android Copyright © 2011-2013 | Powered by Blogger