How to Root Galaxy Note 8.0 N5100 on Android 4.1.2 XXBMD1 Jelly Bean Firmware

Tuesday, October 22, 2013

Are You Looking For How to Root Galaxy Note 8.0 N5100 on Android 4.1.2 XXBMD1 Jelly Bean Firmware
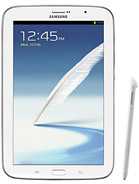

An Official Android 4.1.2 Jelly Bean Over-The-Air (OTA) update with base firmware XXBMD1 has been released for the international version of Samsung Galaxy Note 8.0 bearing model number GT-N5100.

Samsung Galaxy Note 8.0 N5100 users who have already updated their devices with Android 4.1.2 XXBMD1 Jelly Bean firmware, may root their devices using the tutorial below.

This tutorial uses CF-Auto-Root file released by recognised XDA Developers, Chainfire. The CF-Auto-Root file allowing Galaxy Note 8.0 users to root their devices easily without depending on the firmware. It completely supports Android 4.1.2 Jelly Bean and future firmware as well.

Disclaimer: Rooting voids the warranty of your device. We and the developer of this rooting procedures shall not be held responsible if any undesirable outcomes may happen to your device. use of this root guide is solely at your own risk!

Pre-requisites
1. Install USB Driver for Samsung Galaxy Note 8.0 on the computer.
2. Enable USB Debugging Mode on the phone by navigating to Settings >> Developer Options.
3. Make a backup of all your important data before following the guide.
4. The Galaxy Note 8.0 should be factory unlocked and not locked to any particular carrier.
5. Ensure the battery of the phone is charged more than 80 per cent.
6. The CF-Auto-Root file works only on Samsung Galaxy Note 8.0 N5100. Applying this on any incorrect variant will brick the device. Verify the model number of the Galaxy Note 8.0 by navigating to Settings >> About Phone.

File Required
1. CF-Auto-Root  for Galaxy Note 8.0 N5100 (CF-Auto-Root-kona3g-kona3gxx-gtn5100.zip)
2. Odin 3.07

Steps to Root Galaxy Note 8.0 N5100 on Android 4.1.2 XXBMD1 Jelly Bean Firmware
Step 1: Extract downloaded CF-Auto-Root zip file and you will find a .tar.md5 file within it.
Step 2: Extract Odin zip file and you will get Odin3 v3.07.exe along with few other files.
Step 3: Power off your phone. Wait 5-6 seconds for vibration to confirm complete switch off.
Step 4: Boot the device into Download Mode by pressing and holding Volume Down + Home buttons together and then press the Power button until the device turns on. Now press the Volume Up button to enter Download Mode.
Step 5: Run Odin on the computer as an Administrator.
Step 6: Connect the Galaxy Note 8.0 to the computer using USB cable while it is in the Download Mode. Wait until Odin detects the device. When the device is connected successfully, the ID: COM box will turn yellow with the COM port number. Additionally, the successful connected will be indicated by a message saying Added. If Odin fails to detect the device then re-install USB driver.
Step 7: Select these files in Odin at respective buttons:
  • Click the PDA Button, and select CF-Auto-Root-kona3g-kona3gxx-gtn5100.tar.md5.
Step 8: In Odin, enable Auto Reboot and F. Reset Time checkboxes. Also, ensure the Re-Partition checkbox is chosen only if a .pit file was chosen in the previous step.
Step 9: Verify everything suggested in Step 7 and Step 8 is done correctly. Then hit the START button to begin the flashing process.
Step 10: Once flashing completed, your phone will restart and soon you will see a PASS message with green background in the left-most box at the very top of the Odin. You can now unplug the USB cable to disconnect your device from computer.

Your Samsung Galaxy Note 8.0 N5100 running on Android 4.1.2 XXBMD1 Jelly Bean firmware is now rooted successfully. You may now install any app that requires root permission.

Note: Tested working on Galaxy Note 8.0 N5100 with Android 4.1.2 XXBMD1 Jelly Bean firmware, should work with other Jelly Bean firmware.

Screenshot 1: Flashing CF-Auto-Root via Odin
Screenshot 2: Rooted!
Thank's to all fellas at XDA who first tried out this rooting technique. This root method was originally posted via XDA-Developers original thread.

Thanks for Read How to Root Galaxy Note 8.0 N5100 on Android 4.1.2 XXBMD1 Jelly Bean Firmware Article

How to Update Galaxy Tab 7.7 P6800 with Android 4.1.2 DXMD3 Jelly Bean Official Firmware

Monday, October 21, 2013

Are You Looking For How to Update Galaxy Tab 7.7 P6800 with Android 4.1.2 DXMD3 Jelly Bean Official Firmware


Finally! The long awaited official Android 4.1.2 Jelly Bean update for Samsung Galaxy Tab 7.7 GT-P6800 is now starts to roll out and recently hitting South East Asia regions, including Indonesia, Malaysia, Philippines, Singapore, Vietnam, and Thailand.

This update Brings the 4.1.2 Jelly Bean goodies including Google Now, Smart Stay and other stuff. But there is no Multi-View added support on this update.

Firmware details
PDA: P6800DXMD3
CSC: P6800OLBMD3
Version: Android 4.1.2
Built date: April, 2013
Regions: Indonesia, Malaysia, Philippines, Singapore, Vietnam, Thailand

The Galaxy Tab 7.7 users who fail to upgrade their devices with Android 4.1.2 DXMD3 Jelly Bean using official method for being region specific, may follow our step-by-step guide to install the update manually.

Pre-requisites
1. Install USB Driver for Samsung Galaxy Tab 7.7 on the computer.
2. Enable USB Debugging Mode on the phone by navigating to Settings >> Developer Options.
3. Make a backup of all your important data before following the guide.
4. The Galaxy Tab 7.7 should be factory unlocked and not locked to any particular carrier.
5. Ensure the battery of the tablet is charged more than 80 per cent.
6. The Android 4.1.2 DXMD3 Jelly Bean firmware is compatible only with Samsung Galaxy Tab 7.7 P6800. Applying this on any incorrect variant will brick the device. Verify the model number of the Galaxy Tab 7.7 by navigating to Settings >> About Phone.

File Required
1. Android 4.1.2 DXMD3 Jelly Bean Firmware
2. Odin 3.07

Steps to Update Galaxy Tab 7.7 P6800 on Android 4.1.2 DXMD3 Jelly Bean Firmware
Step 1: Extract Firmware zip file that you downloaded already from above link, you will get a .tar.md5 file and some other files.
Step 2: Extract Odin zip file and you will get Odin3 v3.07.exe along with few other files.
Step 3: Power off your tablet. Wait 5-6 seconds for vibration to confirm complete switch off.
Step 4: Boot the device into Download Mode by pressing and holding Volume Down and Power buttons together. A warning screen will arrive, then press Volume Up button to enter into Download Mode.
Step 5: Run Odin on the computer as an Administrator.
Step 6: Connect the Galaxy Tab 7.7 to the computer using USB cable while it is in the Download Mode. Wait until Odin detects the device. When the device is connected successfully, the ID: COM box will turn yellow with the COM port number. Additionally, the successful connected will be indicated by a message saying Added. If Odin fails to detect the device then re-install USB driver.
Step 7: Choose the following files in Odin from extracted P6800DXMD3 firmware folder by using respective checkboxes:
  • Select the PDA checkbox, and choose the file named .tar or .md5.
  • Click the Phone checkbox, and choose the file with 'modem' in its name (ignore if there is no such file)
  • Click the CSC checkbox, and select the file with 'csc' in its name (ignore if such file is missing)
  • Choose the PIT checkbox, and choose the .pit file. Use only the file obtained during extracting in step 1 above, otherwise ignore it.
Step 8: In Odin, enable Auto Reboot and F. Reset Time checkboxes. Also, ensure the Re-Partition checkbox is chosen only if a .pit file was chosen in the previous step.
Step 9: Verify everything suggested in Step 7 and Step 8 is done correctly. Then hit the START button to begin the flashing process.
Step 10: Once flashing completed, your tablet will restart and soon you will see a PASS message with green background in the left-most box at the very top of the Odin. You can now unplug the USB cable to disconnect your device from computer.

Samsung Galaxy Tab 7.7 P6800 should be now updated with official Android 4.1.2 DXMD3 Jelly Bean. Head over to Settings>> About Phone to verify the software version running on the device.

Note: If Galaxy Tab 7.7 P6800 stuck at booting animation after Step 10 then go to recovery mode (press and hold the Volume Up and Power buttons together) and perform Wipe data/Factory Reset and Wipe Cache Partition task before selecting reboot system now function. In recovery mode use Volume keys to navigate between options and Power key to select the option. Please note, performing wiping task will erase your device internal memory data and not external SD card data.

Click here to know How to Root Galaxy Tab 7.7 P6800 running on Android 4.1.2 DXMD3 Jelly Bean firmware.

Thanks for Read How to Update Galaxy Tab 7.7 P6800 with Android 4.1.2 DXMD3 Jelly Bean Official Firmware Article

How to Root Galaxy Tab 7.7 P6800 on Android 4.1.2 DXMD3 Jelly Bean Firmware

Saturday, October 19, 2013

Are You Looking For How to Root Galaxy Tab 7.7 P6800 on Android 4.1.2 DXMD3 Jelly Bean Firmware


Samsung recently rolled out its first official Android 4.1.2 Jelly Bean update with base firmware DXMD3 for Galaxy Tab 7.7 GT-P6800 in several countries. The official firmware is now available for download via Over-The-Air (OTA) update as well as through Samsung KIES.

Samsung Galaxy Tab 7.7 P6800 users who have already updated their devices with Android 4.1.2 DXMD3 Jelly Bean firmware, may root their devices using the tutorial below.

Disclaimer: Rooting voids the warranty of your device. We and the developer of this rooting procedures shall not be held responsible if any undesirable outcomes may happen to your device. use of this root guide is solely at your own risk!

Pre-Requisites
1. Install USB Driver for Samsung Galaxy Tab 7.7 on your computer.
2. Enable USB Debugging Mode on the phone by navigating to Settings >> Developer Options (Android 4.0 or later) or go to Settings >> Applications >> Development (Android 2.3 or earlier).
3. Make a backup of all your important data before following the guide.
4. The Galaxy Tab 7.7 should be factory unlocked and not locked to any particular carrier.
5. Ensure the battery of the phone is charged more than 80 per cent.
6. The CWM Recovery and SuperSU files used for rooting are compatible only with the Samsung Galaxy Tab 7.7 P6800 running on Android 4.1.2 DXMD3 Jelly Bean. Applying these on any incorrect variant will brick the device. Verify the model number of the Galaxy Tab 7.7 by selecting Settings >> About Phone.

File Required
1. Odin3_v3.07.rar
2. cwm-6.0.3.0-p6800.tar
3. UPDATE-SuperSU-v1.25.zip or the latest UPDATE-SuperSU-v1.32.zip

Steps to Install CWM Recovery on Samsung Galaxy Tab 7.7 P6800
Step 1: Extract Odin3_v3.07.rar file using winrar/7zip/winzip or any other extracting tool.
Step 2: Copy UPDATE-SuperSU-v1.25.zip file to external SD card of tablet.
Step 3: Switch off the Galaxy Tab 7.7. Then boot the device into Download Mode by pressing and holding Volume Down and Power buttons together. A warning screen will arrive, then press Volume Up button to enter into Download Mode.
Step 4: Run Odin on your computer.
Step 5: Connect the tablet to the computer using the USB cable while the device is in the Download Mode. A message saying Added will arrive under Odin's message box in the bottom left. You will also get to see COM port with a number in Yellow when the tablet is connected to the computer successfully.
Step 6: In Odin, click the PDA and select the cwm-6.0.3.0-p6800.tar file. Also, ensure the Re-Partition option in Odin is not selected.
Step 7: Double-check and click Start in Odin. The installation process will now begin.
Step 8: Once installation is completed, the tablet will reboot automatically. After the home screen appears, unplug USB cable from the tablet to disconnect it from the computer.

Steps to root Galaxy Tab 7.7 P6800 by Installing SuperSU via CWM Recovery
Step 9: Reboot the Galaxy Tab 7.7 into CWM Recovery Mode by pressing and holding the Volume Up and Power buttons together.
Step 10: Now select install zip from sdcard, select choose zip from external sdcard and then navigate to the UPDATE-SuperSU-v1.25.zip file. Select and confirm installation by selecting Yes.
Step 11: Once installation process is completed, return to main recovery menu and select reboot system now to reboot tablet.

The Samsung Galaxy Tab 7.7 P6800 running on Android 4.1.2 DXMD3 Jelly Bean firmware is now rooted successfully. You may now install any app that requires root permission.

[Note: Tested working on Galaxy Tab 7.7 P6800 with Android 4.1.2 DXMD3 Jelly Bean firmware, should work with other Jelly Bean firmware. Try it and let us know.]

Screenshot 1: Installing CWM Recovery using Odin

Screenshot 2: Installing SuperSU via CWM Recovery

Screenshot 3: Rooted
Thank's to all fellas at XDA who first tried out this rooting technique. This root method was originally posted via XDA-Developers. All credit goes to CWM Recovery and SuperSU original thread.

Click here to know How to Update Galaxy Tab 7.7 P6800 with Android 4.1.2 DXMD3 Jelly Bean official firmware.

Thanks for Read How to Root Galaxy Tab 7.7 P6800 on Android 4.1.2 DXMD3 Jelly Bean Firmware Article

How to Update Galaxy Tab 7.0 Plus P6200 with Android 4.1.2 XXMD6 Jelly Bean Official Firmware

Friday, October 18, 2013

Are You Looking For How to Update Galaxy Tab 7.0 Plus P6200 with Android 4.1.2 XXMD6 Jelly Bean Official Firmware


Southeast Asia owners of the Samsung Galaxy Tab 7.0 Plus GT-P6200, your Android 4.1.2 Jelly Bean update is now live via Samsung Kies, the firmware build numbers are P6200XXMD6. This XXMD6 is freshly build on April 26th, a full upgrade to Android 4.1.2 from previous 4.0.4 ICS.

This update brings some new stuff on the Samsung Galaxy Tab Plus 7.0 such as Google Now, Smart Stay, Blocking Mode that let users block any unwanted calls, new Gallery, a redesigned Home Screen launcher, Text-to-speech capability and a new notifications settings.

Firmware details
PDA: P6200XXMD6
CSC: P6200OLBMD5
Version: Android 4.1.2
Built date: April, 2013
Regions: Indonesia, Malaysia, Philippines, Singapore, Vietnam, Thailand

The Galaxy Tab 7.0 Plus users who fail to upgrade their devices with Android 4.1.2 XXMD6 Jelly Bean via official method for being region specific, may follow our step-by-step guide to install the update manually.

Pre-requisites
1. Install USB Driver for Samsung Galaxy Tab 7.0 Plus on the computer.
2. Enable USB Debugging Mode on the phone by navigating to Settings >> Developer Options.
3. Make a backup of all your important data before following the guide.
4. The Galaxy Tab 7.0 Plus should be factory unlocked and not locked to any particular carrier.
5. Ensure the battery of the tablet is charged more than 80 per cent.
6. The Android 4.1.2 XXMD6 Jelly Bean firmware is compatible only with Samsung Galaxy Tab 7.0 Plus P6200. Applying this on any incorrect variant will brick the device. Verify the model number of the Galaxy Tab 7.0 Plus by navigating to Settings >> About Phone.

File Required
1. Android 4.1.2 XXMD6 Jelly Bean Firmware for Galaxy Tab 7.0 Plus P6200
2. Odin 3.07

Steps to Update Galaxy Tab 7.0 Plus P6200 with Android 4.1.2 XXMD6 Jelly Bean Firmware
Step 1: Extract Firmware zip file that you downloaded already from above link, you will get a .tar.md5 file and some other files.
Step 2: Extract Odin zip file and you will get Odin3 v3.07.exe along with few other files.
Step 3: Power off your tablet. Wait 5-6 seconds for vibration to confirm complete switch off.
Step 4: Boot the device into Download Mode by pressing and holding Volume Down and Power buttons together. A warning screen will arrive, then press Volume Up button to enter into Download Mode.
Step 5: Run Odin on the computer as an Administrator.
Step 6: Connect the Galaxy Tab 7.0 Plus to the computer using USB cable while it is in the Download Mode. Wait until Odin detects the device. When the device is connected successfully, the ID: COM box will turn yellow with the COM port number. Additionally, the successful connected will be indicated by a message saying Added. If Odin fails to detect the device then re-install USB deriver.
Step 7: Choose the following files in Odin from extracted P6200XXMD6 firmware folder by using respective checkboxes:
  • Select the PDA checkbox, and choose the file named .tar or .md5.
  • Click the Phone checkbox, and choose the file with 'modem' in its name (ignore if there is no such file)
  • Click the CSC checkbox, and select the file with 'csc' in its name (ignore if such file is missing)
  • Choose the PIT checkbox, and choose the .pit file. Use only the file obtained during extracting in step 1 above, otherwise ignore it.
Step 8: In Odin, enable Auto Reboot and F. Reset Time checkboxes. Also, ensure the Re-Partition checkbox is chosen only if a .pit file was chosen in the previous step.
Step 9: Verify everything suggested in Step 7 and Step 8 is done correctly. Then hit the START button to begin the flashing process.
Step 10: Once flashing completed, your tablet will restart and soon you will see a PASS message with green background in the left-most box at the very top of the Odin. You can now unplug the USB cable to disconnect your device from computer.

Samsung Galaxy Tab 7.0 Plus P6200 should be now updated with official Android 4.1.2 XXMD6 Jelly Bean. Head over to Settings>> About Phone to verify the software version running on the device.

Note: If Galaxy Tab 7.0 Plus P6200 stuck at booting animation after Step 10 then go to recovery mode (press and hold the Volume Up and Power buttons together) and perform Wipe data/Factory Reset and Wipe Cache Partition task before selecting reboot system now function. In recovery mode use Volume keys to navigate between options and Power key to select the option. Please note, performing wiping task will erase your device internal memory data and not external SD card data.

Click here to know How to Root Galaxy Tab 7.0 Plus P6200 running on Android 4.1.2 XXMD6 Jelly Bean firmware.

Thanks for Read How to Update Galaxy Tab 7.0 Plus P6200 with Android 4.1.2 XXMD6 Jelly Bean Official Firmware Article

How to Root Galaxy Tab 7.0 Plus P6200 on Android 4.1.2 XXMD6 Jelly Bean Firmware

Are You Looking For How to Root Galaxy Tab 7.0 Plus P6200 on Android 4.1.2 XXMD6 Jelly Bean Firmware


Samsung recently started rolling out its first official Android 4.1.2 Jelly Bean update with base firmware XXMD6 for the Galaxy Tab 7.0 Plus with model number GT-P6200 in several countries. The new official firmware is now available for download through Samsung KIES as well as Over-The-Air (OTA) update in Southeast Asia countries - Indonesia, Malaysia, Philippines, Singapore, Vietnam, and Thailand.

Samsung Galaxy Tab 7.0 Plus P6200 users who have already updated their devices with Android 4.1.2 XXMD6 Jelly Bean firmware, may root their devices using the tutorial below.

Disclaimer: Rooting voids the warranty of your device. We and the developer of this rooting procedures shall not be held responsible if any undesirable outcomes may happen to your device. use of this root guide is solely at your own risk!

Pre-Requisites
1. Install USB Driver for Samsung Galaxy Tab 7.0 Plus on your computer.
2. Enable USB Debugging Mode on the phone by navigating to Settings >> Developer Options.
3. Make a backup of all your important data before following the guide.
4. The Galaxy Tab 7.0 Plus should be factory unlocked and not locked to any particular carrier.
5. Ensure the battery of the phone is charged more than 80 per cent.
6. The Recovery and Superuser files used for rooting are compatible only with the Samsung Galaxy Tab 7.0 Plus P6200 running on Android 4.1.2 XXMD6 Jelly Bean. Applying these on any incorrect variant will brick the device.

File Required
1. Odin3_v3.07.rar
2. recovery.tar.rar
3. Superuser-3.1.3-arm-signed.zip

Steps to Install CWM Recovery on Samsung Galaxy Tab 7.0 Plus P6200
Step 1: Extract Odin3_v3.07.rar and recovery.tar.rar files using winrar/7zip/winzip or any other extracting tool.
Step 2: Copy Superuser-3.1.3-arm-signed.zip file to external SD card of tablet.
Step 3: Switch off the Galaxy Tab 7.0 Plus. Then boot the device into Download Mode by pressing and holding Volume Down and Power buttons together. A warning screen will arrive, then press Volume Up button to enter into Download Mode.
Step 4: Run Odin on your computer.
Step 5: Connect the tablet to the computer using the USB cable while the device is in the Download Mode. A message saying Added will arrive under Odin's message box in the bottom left. You will also get to see COM port with a number in Yellow when the tablet is connected to the computer successfully.
Step 6: In Odin, click the PDA and select the recovery.tar.md5 file. Also, ensure the Re-Partition option in Odin is not selected.
Step 7: Double-check and click Start in Odin. The installation process will now begin.
Step 8: Once installation is completed, the tablet will reboot automatically. After the home screen appears, unplug USB cable from the tablet to disconnect it from the computer.

Steps to root Galaxy Tab 7.0 Plus P6200 by Installing Superuser via CWM Recovery
Step 9: Reboot the Galaxy Tab 7.0 Plus into Recovery Mode by pressing and holding the Volume Up and Power buttons together.
Step 10: Now select install zip from sdcard, select choose zip from external sdcard and then navigate to the Superuser-3.1.3-arm-signed.zip file. Select and confirm installation by selecting Yes.
Step 11: Once installation process is completed, return to main recovery menu and select reboot system now to reboot tablet.

[Note: You can replace Superuser with SuperSU if you think the latter is the better one.]

The Samsung Galaxy Tab 7.0 Plus P6200 running on Android 4.1.2 XXMD6 Jelly Bean firmware is now rooted successfully. You may now install any app that requires root permission.

Thank's to all fellas at XDA who first tried out this rooting technique. This root method was originally posted via XDA-Developers original thread.
Thanks for Read How to Root Galaxy Tab 7.0 Plus P6200 on Android 4.1.2 XXMD6 Jelly Bean Firmware Article

How to Update Galaxy Grand Duos I9082 with Android 4.1.2 XXAMD6 Jelly Bean Official Firmware

Thursday, October 17, 2013

Are You Looking For How to Update Galaxy Grand Duos I9082 with Android 4.1.2 XXAMD6 Jelly Bean Official Firmware


Samsung has rolled out another official Jelly Bean update, Android 4.1.2 with base firmware XXAMD6, for the international version of Galaxy Grand Duos bearing model number GT-I9082. The new official firmware is now available for download through Samsung KIES as well as Over-The-Air (OTA) update in Southeast Asia countries including Indonesia, Malaysia, Philippines, Singapore,Vietnam and Thailand.

Firmware details
PDA: I9082XXAMD6
CSC: I9082OLBAMD3
Version: Android 4.1.2
Built date: April, 2013
Regions: Indonesia, Malaysia, Philippines, Singapore, Vietnam, Thailand

The Galaxy Grand Duos users who failed to receive the OTA update notification or unable to access the update over Samsung KIES can download and install the same manually, using our step-by-step guide.

Pre-requisites
1. Install USB Driver for Samsung Galaxy Grand Duos on the computer.
2. Enable USB Debugging Mode.
3. Make a backup of all your important data before following the guide.
4. The Galaxy Grand Duos should be factory unlocked and not locked to any particular carrier.
5. Ensure the battery of the phone is charged more than 80 per cent.
6. The Android 4.1.2 XXAMD6 Jelly Bean firmware is compatible only with Samsung Galaxy Grand Duos I9082 and installing this on any incorrect variant will brick the device.

File Required
1. Android 4.1.2 XXAMD6 Jelly Bean Firmware
2. Odin 3.07

Steps to Update Galaxy Grand Duos I9082 with Android 4.1.2 XXAMD6 Jelly Bean Firmware
Step 1: Extract Firmware zip file that you downloaded already from above link, you will get a .tar.md5 file and some other files.
Step 2: Extract Odin zip file and you will get Odin3 v3.07.exe along with few other files.
Step 3: Power off your phone. Wait 5-6 seconds for vibration to confirm complete switch off.
Step 4: Boot the device into Download Mode by pressing and holding Volume Down + Home buttons together and then press the Power button until the device turns on. Now press the Volume Up button to enter Download Mode.
Step 5: Run Odin on the computer.
Step 6: Connect the Galaxy Grand Duos to the computer using USB cable while it is in the Download Mode. Wait until Odin detects the device. When the device is connected successfully, the ID: COM box will turn yellow with the COM port number. Additionally, the successful connected will be indicated by a message saying Added. If Odin fails to detect the device then re-install USB driver.
Step 7: Choose the following files in Odin from extracted I9082XXAMD6 firmware folder by using respective checkboxes:
  • Select the PDA checkbox, and choose the file named .tar or .md5.
  • Click the Phone checkbox, and choose the file with 'modem' in its name (ignore if there is no such file)
  • Click the CSC checkbox, and select the file with 'csc' in its name (ignore if such file is missing)
  • Choose the PIT checkbox, and choose the .pit file. Use only the file obtained during extracting in step 1 above, otherwise ignore it.
Step 8: In Odin, enable Auto Reboot and F. Reset Time checkboxes. Also, ensure the Re-Partition checkbox is chosen only if a .pit file was chosen in the previous step.
Step 9: Verify everything suggested in Step 7 and Step 8 is done correctly. Then hit the START button to begin the flashing process.
Step 10: Once flashing completed, your phone will restart and soon you will see a PASS message with green background in the left-most box at the very top of the Odin. You can now unplug the USB cable to disconnect your device from computer.

Samsung Galaxy Grand Duos I9082 should be now updated with official Android 4.1.2 XXAMD6 Jelly Bean firmware. Head over to Settings>> About Phone to verify the software version running on the device.

Note: If Galaxy Grand Duos I9082 stuck at booting animation after Step 10 then go to recovery mode (press and hold the Volume Up, Home and Power buttons together) and perform Wipe data/Factory Reset and Wipe Cache Partition task before selecting reboot system now function. In recovery mode use Volume keys to navigate between options and Power key to select the option. Please note, performing wiping task will erase your device internal memory data and not external SD card data.

Click here to know How to Root Galaxy Grand Duos I9082 running on Android 4.1.2 XXAMCE Jelly Bean firmware.

Thanks for Read How to Update Galaxy Grand Duos I9082 with Android 4.1.2 XXAMD6 Jelly Bean Official Firmware Article

How to Update Galaxy S4 I9500 with Android 4.2.2 XXUAME1 Jelly Bean Official Firmware

Wednesday, October 16, 2013

Are You Looking For How to Update Galaxy S4 I9500 with Android 4.2.2 XXUAME1 Jelly Bean Official Firmware


Samsung has released another official Android 4.2.2 Jelly Bean update with firmware build number I9500XXUAME1 on Samsung Galaxy S4 GT-I9500. The new official firmware reportedly brings a host of bug-fixes and feature enhancements over its previous build. The official firmware is now available for download in select Southeast Asia countries as an Over-The-Air (OTA) update as well as via Samsung KIES.

Firmware details
PDA: I9500XXUAME1
CSC: I9500OLBAMDK
Version: Android 4.2.2
Built date: May, 2013
Regions: Indonesia, Malaysia, Philippines, Singapore, Vietnam, Thailand

The Galaxy S4 I9500 users who fail to upgrade their devices with Android 4.2.2 XXUAME1 Jelly Bean using official method for being region specific, may follow our step-by-step guide to install the update manually.

Pre-requisites
1. Install USB Driver for Samsung Galaxy S4 on the computer.
2. Enable USB Debugging Mode.
3. Make a backup of all your important data before following the guide.
4. The  Galaxy S4 should be factory unlocked and not locked to any particular carrier.
5. Ensure the battery of the phone is charged more than 80 per cent.
6. The Android 4.2.2 XXUAME1 Jelly Bean firmware is compatible only with Samsung  Galaxy S4 I9500 and installing this on any incorrect variant will brick the device.

File Required
1. Android 4.2.2 XXUAME1 Jelly Bean Firmware
2. Odin 3.07

Steps to Update  Galaxy S4 I9500 with Android 4.2.2 XXUAME1 Jelly Bean Firmware
Step 1: Extract Firmware zip file that you downloaded already from above link, you will get a .tar.md5 file and some other files.
Step 2: Extract Odin zip file and you will get Odin3 v3.07.exe along with few other files.
Step 3: Power off your phone. Wait 5-6 seconds for vibration to confirm complete switch off.
Step 4: Boot the device into Download Mode by pressing and holding Volume Down + Home buttons together and then press the Power button until the device turns on. Now press the Volume Up button to enter Download Mode.
Step 5: Run Odin on the computer as an Administrator.
Step 6: Connect the  Galaxy S4 to the computer using USB cable while it is in the Download Mode. Wait until Odin detects the device. When the device is connected successfully, the ID: COM box will turn yellow with the COM port number. Additionally, the successful connected will be indicated by a message saying Added. If Odin fails to detect the device then re-install USB driver.
Step 7: Choose the following files in Odin from extracted I9500XXUAME1 firmware folder by using respective checkboxes:
  • Select the PDA checkbox, and choose the file named .tar or .md5.
  • Click the Phone checkbox, and choose the file with 'modem' in its name (ignore if there is no such file)
  • Click the CSC checkbox, and select the file with 'csc' in its name (ignore if such file is missing)
  • Choose the PIT checkbox, and choose the .pit file. Use only the file obtained during extracting in step 1 above, otherwise ignore it.
Step 8: In Odin, enable Auto Reboot and F. Reset Time checkboxes. Also, ensure the Re-Partition checkbox is chosen only if a .pit file was chosen in the previous step.
Step 9: Verify everything suggested in Step 7 and Step 8 is done correctly. Then hit the START button to begin the flashing process.
Step 10: Once flashing completed, your phone will restart and soon you will see a PASS message with green background in the left-most box at the very top of the Odin. You can now unplug the USB cable to disconnect your device from computer.

Samsung Galaxy S4 I9500 should be now updated with official Android 4.2.2 XXUAME1 Jelly Bean. Head over to Settings >> About Phone to verify the software version running on the device.

Note: If Galaxy S4 I9500 stuck at booting animation after Step 10 then go to recovery mode (press and hold the Volume Up, Home and Power buttons together) and perform Wipe data/Factory Reset and Wipe Cache Partition task before selecting reboot system now function. In recovery mode use Volume keys to navigate between options and Power key to select the option. Please note, performing wiping task will erase your device internal memory data and not external SD card data.

There are several methods for rooting the Galaxy S4 I9500. Click here to know How to Root Galaxy S4 I9500 running on Android 4.2.2 Jelly Bean by installing Cofface's CWM Recovery, Adam Kernel or Chainfire's CF-Auto-Root.

Thanks for Read How to Update Galaxy S4 I9500 with Android 4.2.2 XXUAME1 Jelly Bean Official Firmware Article


Root Your Android Copyright © 2011-2013 | Powered by Blogger